
How to Play Drive-Thru Empire
The loop you are actually running, what the HUD is telling you, and the order to spend your first cash in. This page is about getting started — the progression guide takes over once you are past the first world gate.
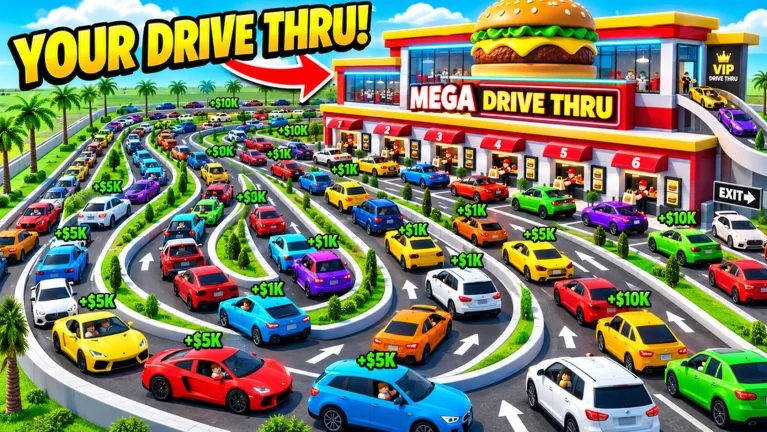
The loop, in one paragraph
Drive-Thru Empire is a Drive-Thru Empire tycoon on Roblox. You roll a customer car, feed it through the drive-thru lane, and get paid per minute while it is being served. Cash buys upgrades, upgrades let you serve more cars per minute, and more cars per minute buys better cars.
A customer car arrives at your lane. Its tier sets how much its order is worth.
The car sits in the lane and pays out over time. Serve speed and order speed decide how fast.
Cash goes into permanent upgrade tracks or into more rolls. Only one of those compounds.
The two halves of that loop are independent, and that is the first thing worth understanding. Cars arriving faster does nothing if the kitchen cannot clear them, and clearing faster does nothing if no car is waiting. Find the slower half before you spend anything.
What the HUD is telling you
Four readouts do most of the work in the first session. None of them is explained in-game, so it is worth knowing what to look at before you buy anything.
The per-minute figure on each car
Each car in the lane shows what it earns per minute while it is being served. That number — not the car tier — is what your upgrade money is actually multiplying, so compare cars by it rather than by rarity colour.
The serve time at the stall
The stall itself has its own upgrade point, separate from the Upgrades menu. The first step there costs $100 and moves the stall from a 4s serve to 3s and from ×1 to ×2, so early on it competes directly with the cheap upgrade tiers for the same few hundred cash.
The offline-earnings banner
The HUD banner states that the drive-thru keeps earning while you are away, and the lot has a marked AFK zone carrying an ×2 sign. Both are worth reading on the sign or the panel itself, because neither the rate nor the terms are published anywhere else.
The luck timer
Luck is the one resource that expires on a timer rather than being spent. A luck window is only worth opening when you already have enough cash to afford several rolls inside it — redeeming it with nothing to spend is the most common early waste.
The stall’s own upgrade point lists the price of each further step in-game.
Your first session, in order
Five steps. The order matters because the first session is where cash and luck time are easiest to waste.
- 1
Take the two free things first
The game asks you to like it and to join the developer group, and it advertises a reward for both. They cost nothing and, unlike the timed boosts, they do not expire. Do them before anything else in the session.
- 2
Claim the one-shot cash codes
Your starting cash is meant to carry the first few upgrades, so claim the cash codes once at the start rather than saving them. The luck code is the exception — see the luck window below.
- 3
Serve customers by hand until the lane fills
A customer car arrives, you serve it, and the card above it pays out. Early on you are the bottleneck, not the kitchen: watch which side of the loop stalls — cars arriving or orders leaving — and fix only that side.
- 4
Buy the cheap multiplier tiers, not the big one
The first tiers of Cars Speed, Spawn Speed and Drop Rate are priced in the low hundreds of cash and multiply the cars you already have. Buying one big ticket item instead is the most common way to stall in the first session.
- 5
Do not chase rare cars yet
Your first rolls are about getting a working ticket value, not a cosmic car. A single decent car that clears customers faster beats several rolls spent hunting a tier you cannot fund yet.
The tracks those cheap tiers belong to, in the order their prices imply, are listed on the progression guide. Once you have picked a track, the upgrade calculator shows what one more tier does to your own payback before you commit the cash.
Where to go next
Each of these answers a different question. Pick the one you are actually asking.
Which codes still work
The cash and luck codes, what each one pays, and where the redeem box is.
What to upgrade, and when to rebirth
The upgrade order, the two world gates ahead of you, and the rule that only cash is lost on a rebirth.
What the car tiers mean
The rarity ladder and what each tier is worth per order.
Whether you are on the right game
Several games share this name. This one is the Roblox tycoon.
If something does not match this page
Prices, tiers and the world board move between builds, and an update can change any of them. When a number here disagrees with what your game shows, your game is right — the in-game panel is the authority. The progression guide states which build these figures were read from.
What is official here, and what is estimated
Official or observed values and community estimates are never mixed inside one number. Drop rates, payout multipliers, station costs, the World 4 threshold and the luck behaviour are estimates made to compare options, not values the developer publishes. See “How the claims on this site were checked”.
- • Game identity, place and universe id, creator, and the World 4 title marker
- • The codes LUCK301, BONUSCASH and WELCOME and the reward each one gives
- • The upgrade track names shown on the in-game upgrade panel
- • Rarity naming Rare / Exotic / Cosmic
- • The World 2 and World 3 unlock gates and their map names
- • Gacha drop percentages per rarity
- • Cash payout multipliers per rarity
- • Station upgrade base costs and cost scaling
- • World station caps and the World 4 cash threshold
- • Order and cook time constants used by the calculator
- • The luck-boost behaviour applied by the roll simulator
Sources
- A creator session — upgrade panel, stall upgrade point and codes
- The in-game upgrade panel — the tracks and tiers used by 7 upgrade tracks
- Roblox games API — game identity and creator
How each claim was checked: /about/